First look at Parallels Plesk Panel 11
By · · 9 mins read · Tech
Last week at World Hosting Days in Germany, Parallels announced the preview of the latest version of their hosting control panel – Parallels Plesk 11. This week the preview was made available for service providers to download and evaluate.
Having used Plesk for 10 years now I was eager to take a look so I installed the software on a development server.
It is important to note that this is a preview release of Plesk and evaluators are urged to provide feedback to Parallels. As a result the product may vary from the final release.
This preview assumes that you’re already familiar with current versions of Plesk from 10 onwards.
Server preparation
To begin with I provisioned a server running CentOS 5 with the latest updates installed. This is my preferred distribution, however Plesk 11.0 will be available on the following operating systems and distributions:
- CentOS 5/6
- CloudLinux 5/6
- Debian 6
- RHEL 5/6
- SuSE 11/12
- Ubuntu 10
- Windows Server 2008
The server was configured as a base install with the latest updates. Plesk as a matter of course will automatically install any required packages during the installation process. To prevent against any possible conflicts, the default firewall was disabled along with SELinux.
Installation
Installation is straightforward, and anybody who has installed Plesk before should be able to install Plesk 11 without experiencing any difficulties. Installation occurs through a command line autoinstaller that is downloaded and executed.
The autoinstaller guides you through configuring the desired modules that Plesk will be configured with. Once completed, any pre-requisite packages are installed and then the actual Plesk packages will be installed.
If all goes well, you will receive a screen like this:
                     Congratulations!
Plesk has been successfully installed on your server.
To complete the system configuration, please proceed to URL:
https://servername:8443/ or https://serverip:8443/

Use the login name 'admin' and password '<YOUR ADMIN PASSWORD>'.
Or use the login name 'root' and your superuser password.

Further, use the following commands to start and stop Plesk:
"/etc/init.d/psa start" and
"/etc/init.d/psa stop" respectively.

All Plesk control panel documentation is available at

http://www.parallels.com/en/products/plesk/docs

           Thank you for choosing our products!
All of the modules available to be selected during the installation are found in earlier versions of Plesk with one exception “Nginx reverse proxy support”. We’ll get to this later.
Initial Configuration
Now that Plesk has been installed it’s time to login to the control panel and perform the initial configuration. The first thing we notice is the slightly different colour scheme, which is a darker than the blue that we’re used to.
It’s interesting that the copyright is now “Parallels IP Holdings GmbH” rather than simply “Parallels”. The next few steps will be familiar to those who have installed Plesk before, such as:
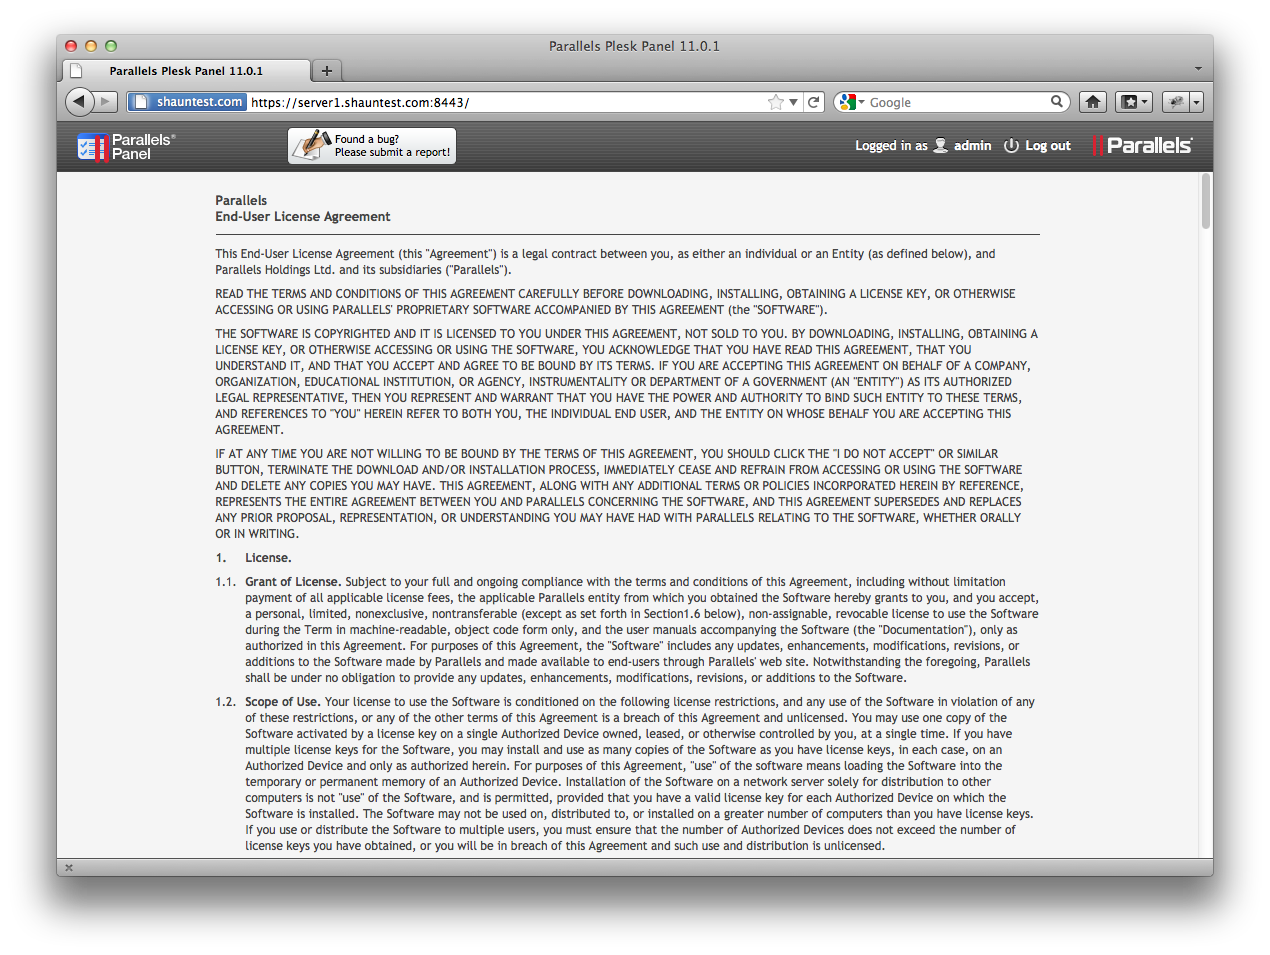
Accepting the license agreement:
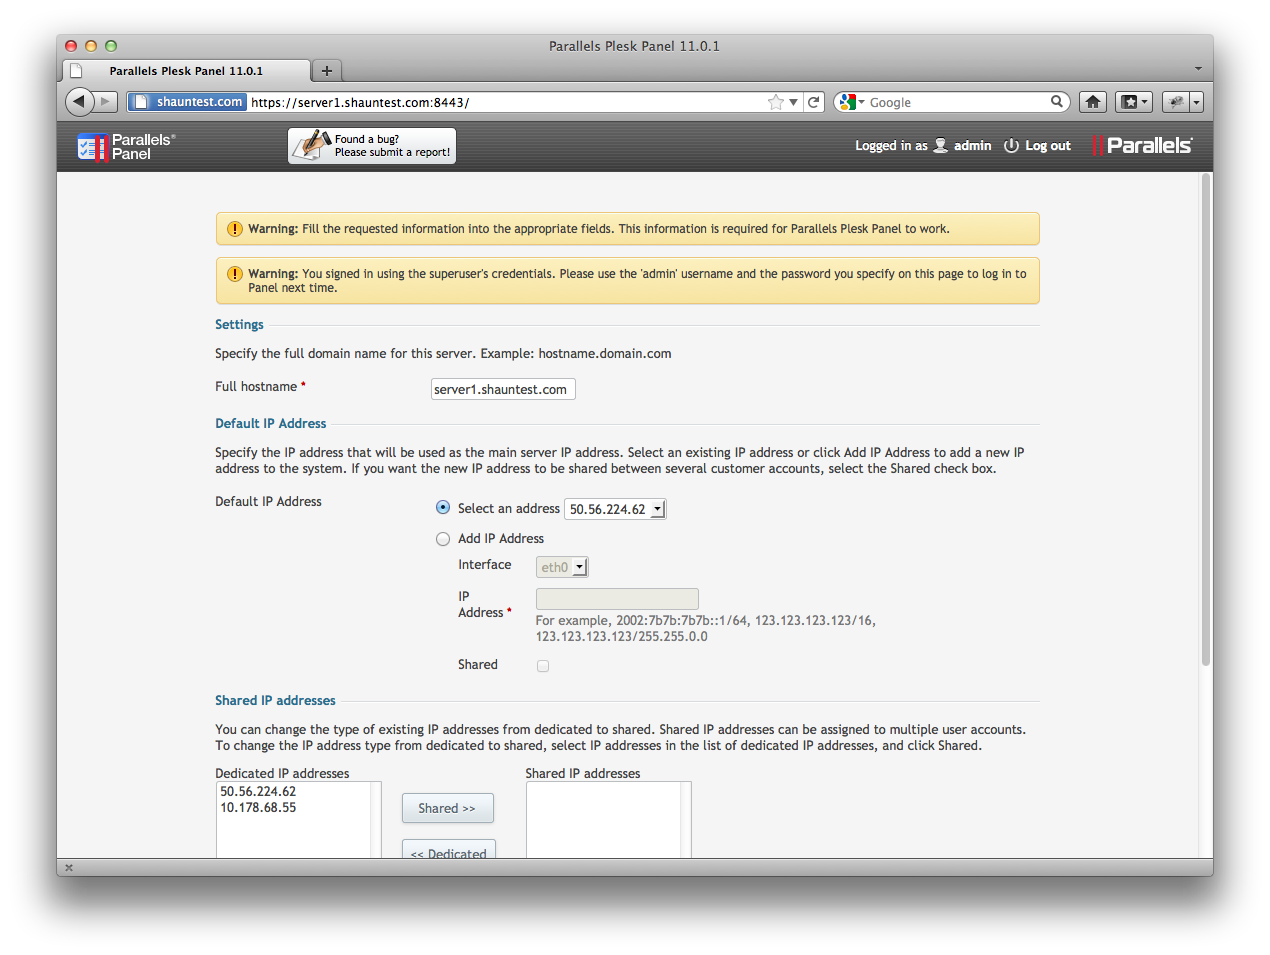
and filling out your server details:
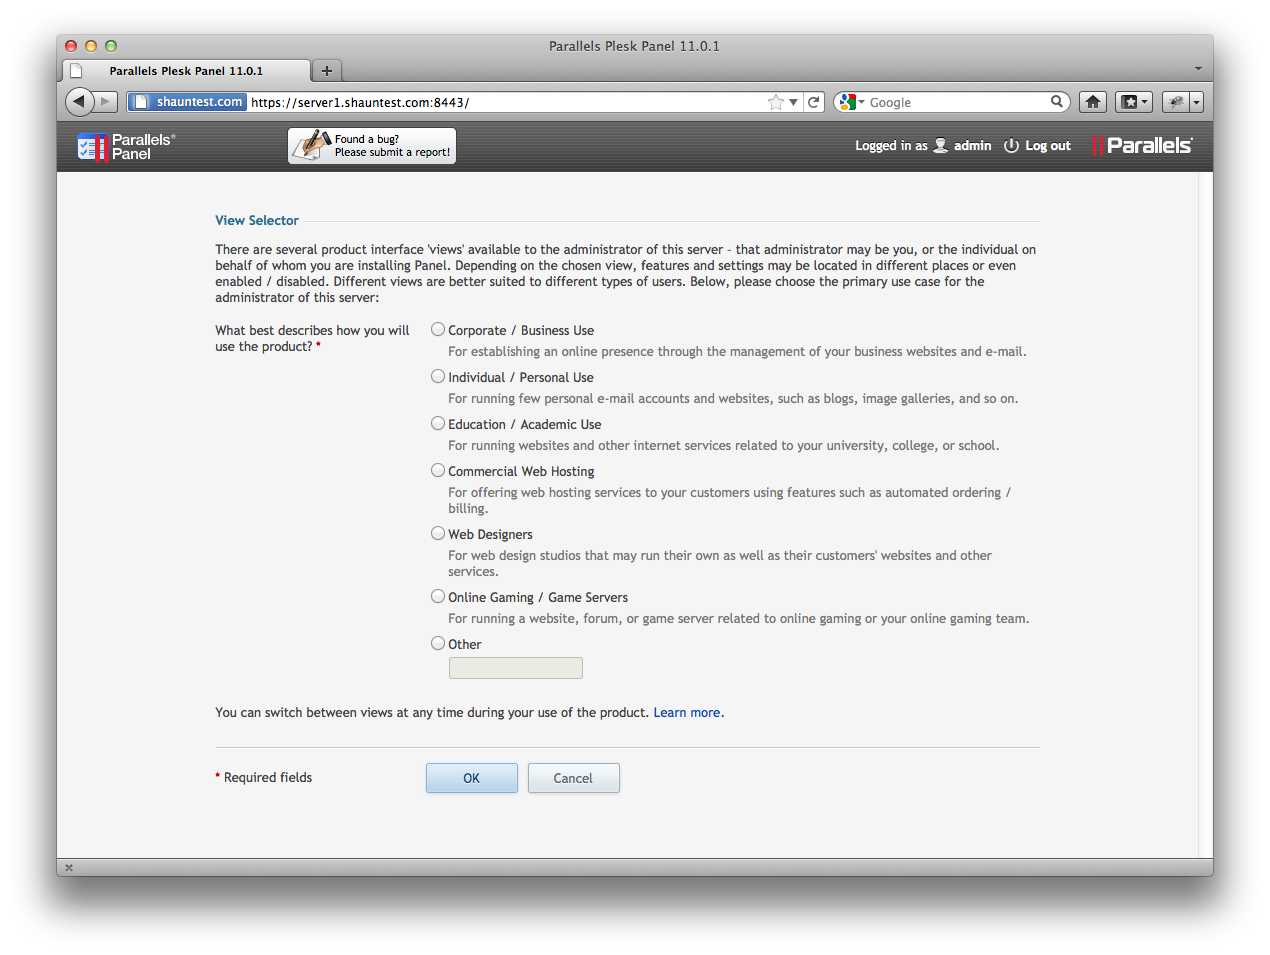
The next screen however is new. In this screen you’re asked how you’ll use the panel, and the choices that are available include Corporate / Business Use, Individual / Personal Use, Education / Academic Use, Commercial Web Hosting, Web Designers, Online Gaming / Game Servers, and “other”.
Once you select what type of customer you are, you’re then able to select the layout of the control panel. For example, a commercial web host would want the service provider view with separate interfaces for the provider, the resellers and the hosting end-users whereas a design firm might want a single unified interface to manage all of the websites and related services.
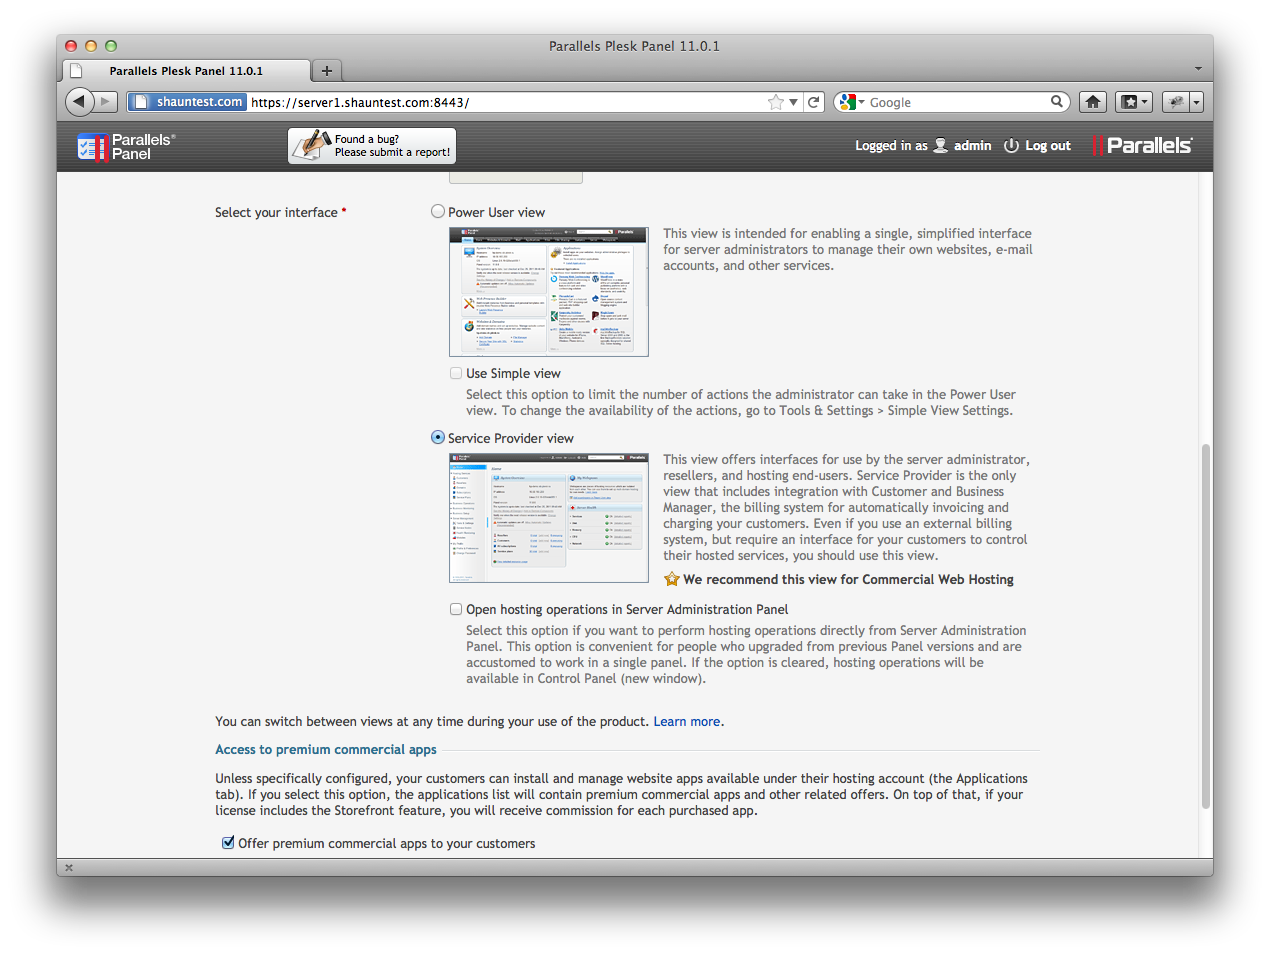
Another option that I’ve noticed is “access to premium commercial apps” where a provider can offer commercial applications to customers and earn commission for each purchased app.
This seems to be new, but I’m not yet sure what the arrangements on this would be.
Moving on we’re prompted to enter the server administrator’s information. This is fairly standard:

Once that’s done you’re informed that the server is unlicensed and are unable to do anything else. From version 10 onwards, Plesk requires the installation of a license and no longer includes the free 1 domain license. As this is a technology preview, I have a license to install.
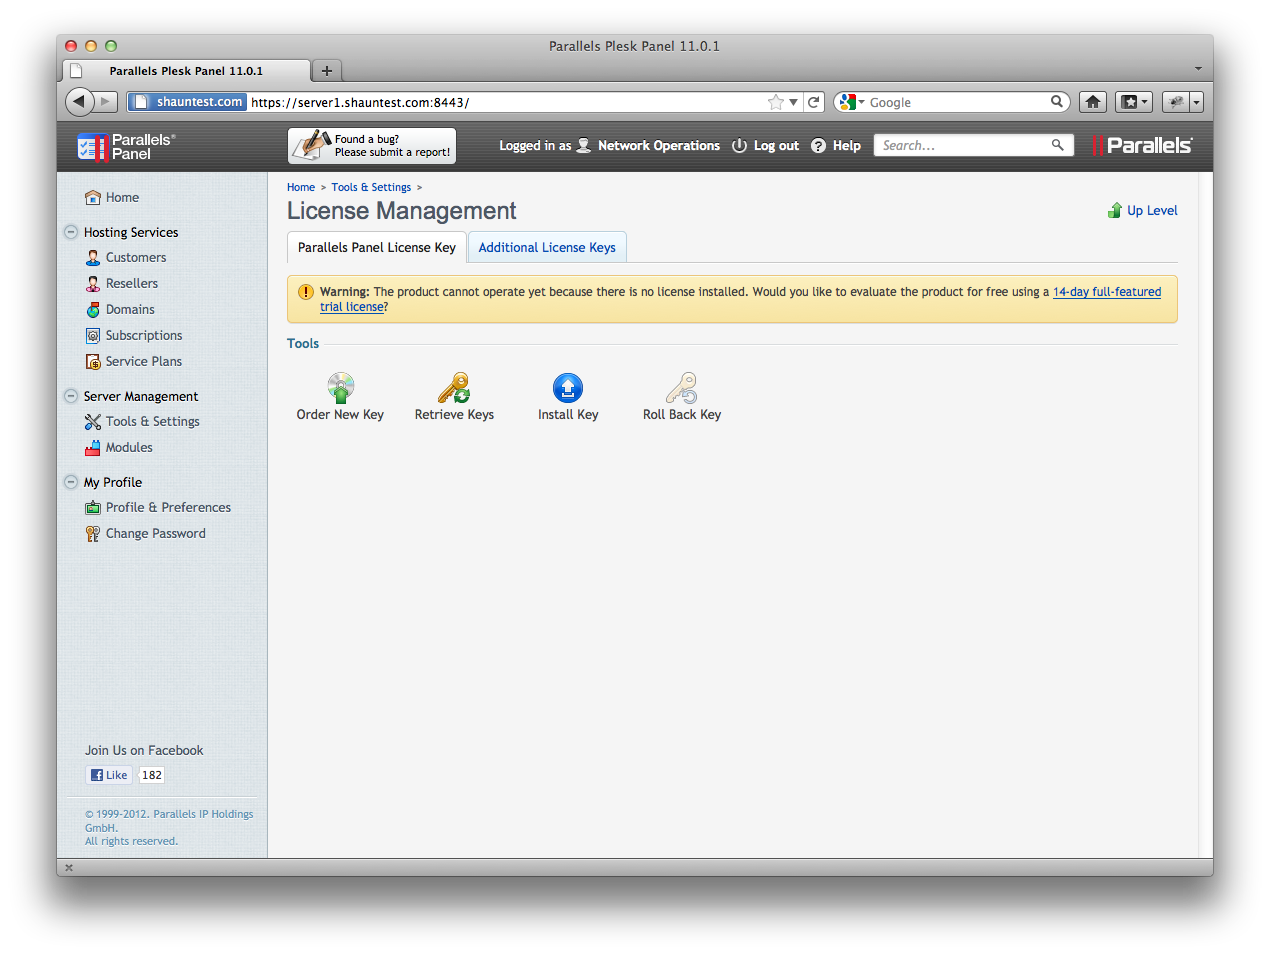
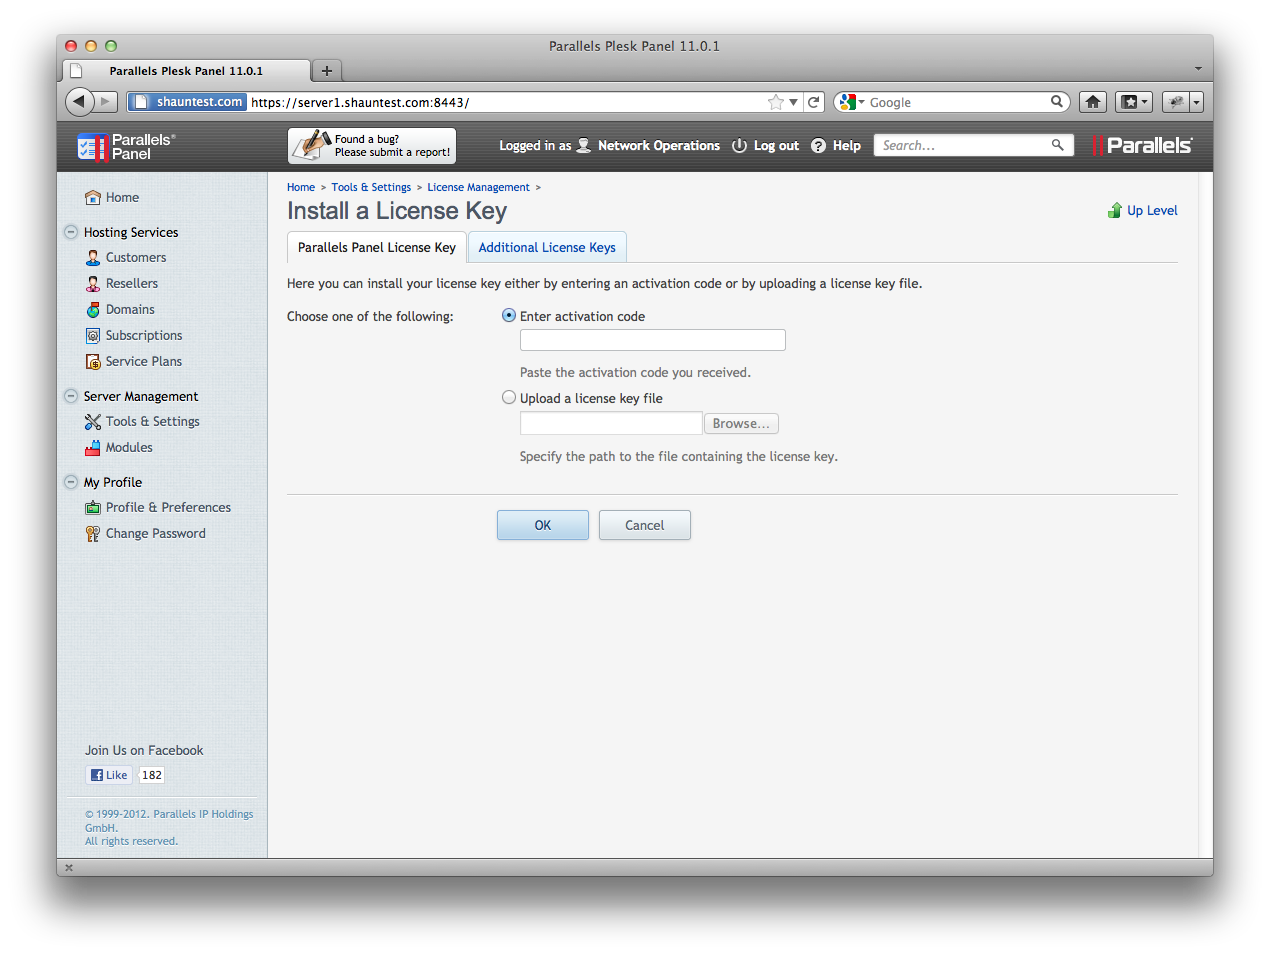
One new feature here is the option to now enter an activation code. This is something that I’ve been wanting to see for a long time. The existing Plesk licensing requires the upload of an XML license file which can onerous. By using an activation code there’s the potential for licensing to be streamlined within larger service providers, and possibly integrate licensing functions directly into a provider’s operational support systems. Once the license has been uploaded the initial configuration is complete.
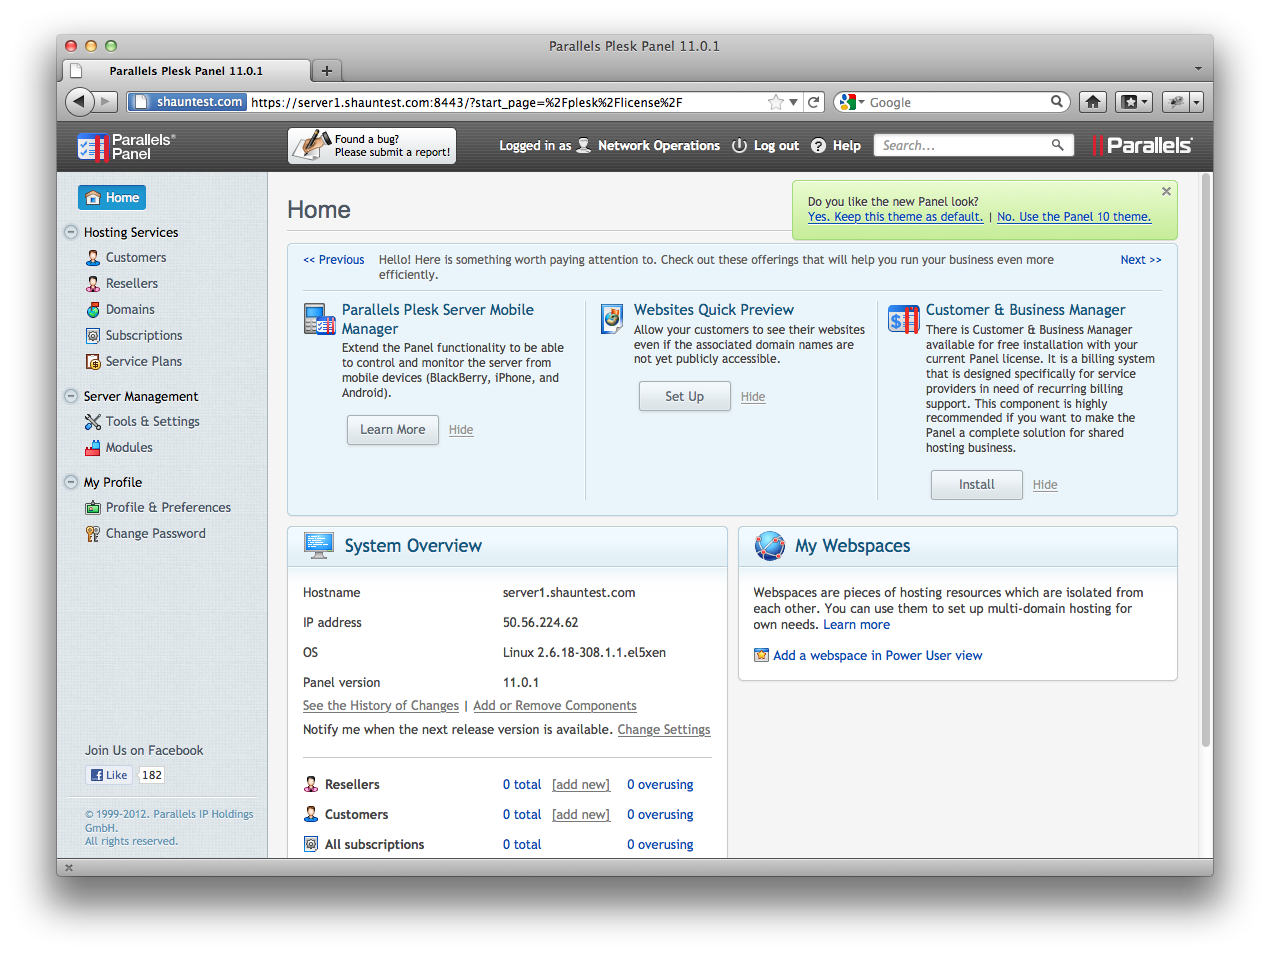
The Panel
The home screen hasn’t changed a lot from previous versions, but it is interesting to note that it asks if you like the new theme and want to keep it, or if you’d prefer to revert to the Plesk 10 look.
If you need a memory refresher, here’s the two versions side by side:
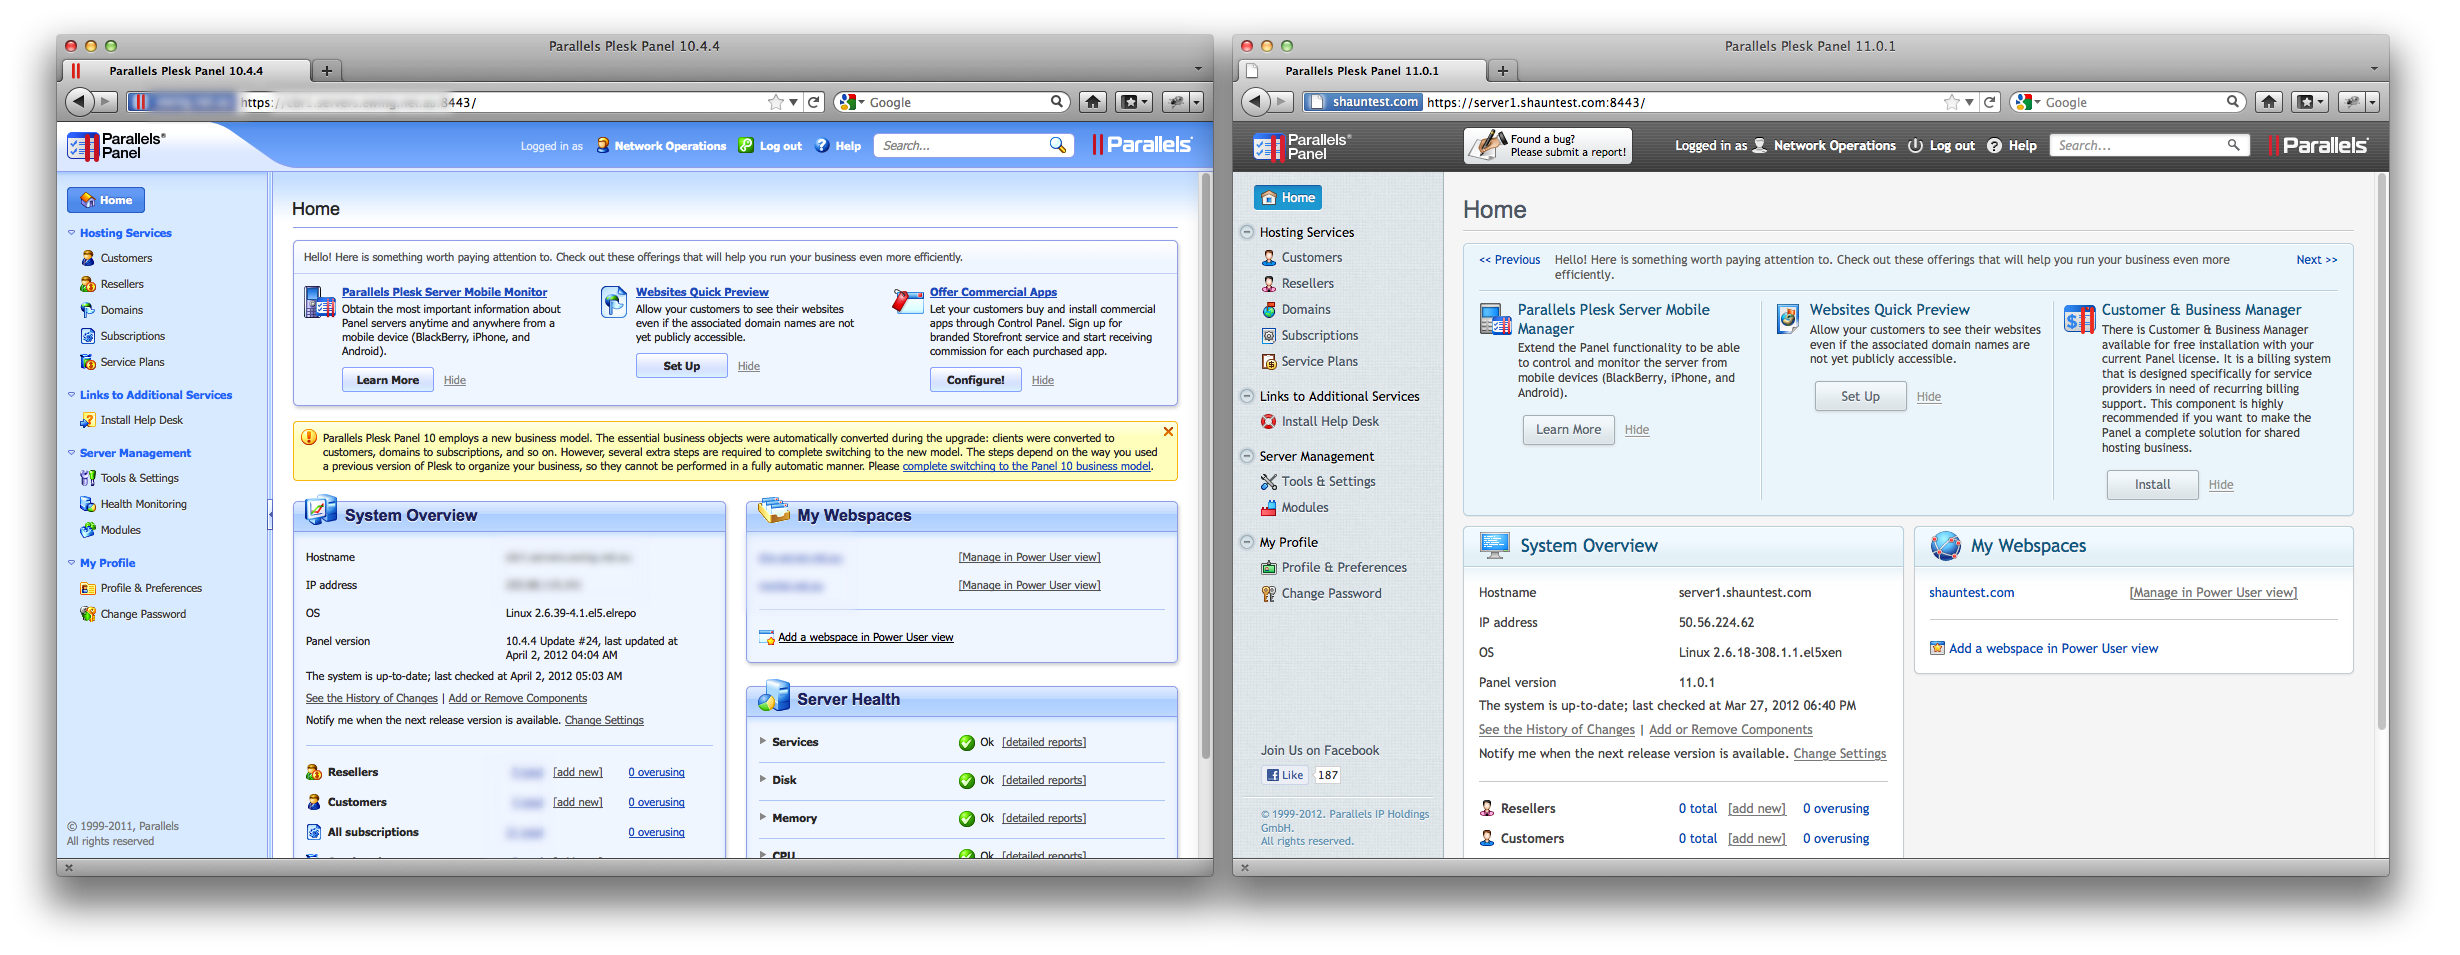
The jury is still out for me. I’m quite fond of the blue, and the smaller text in the old panel layout.
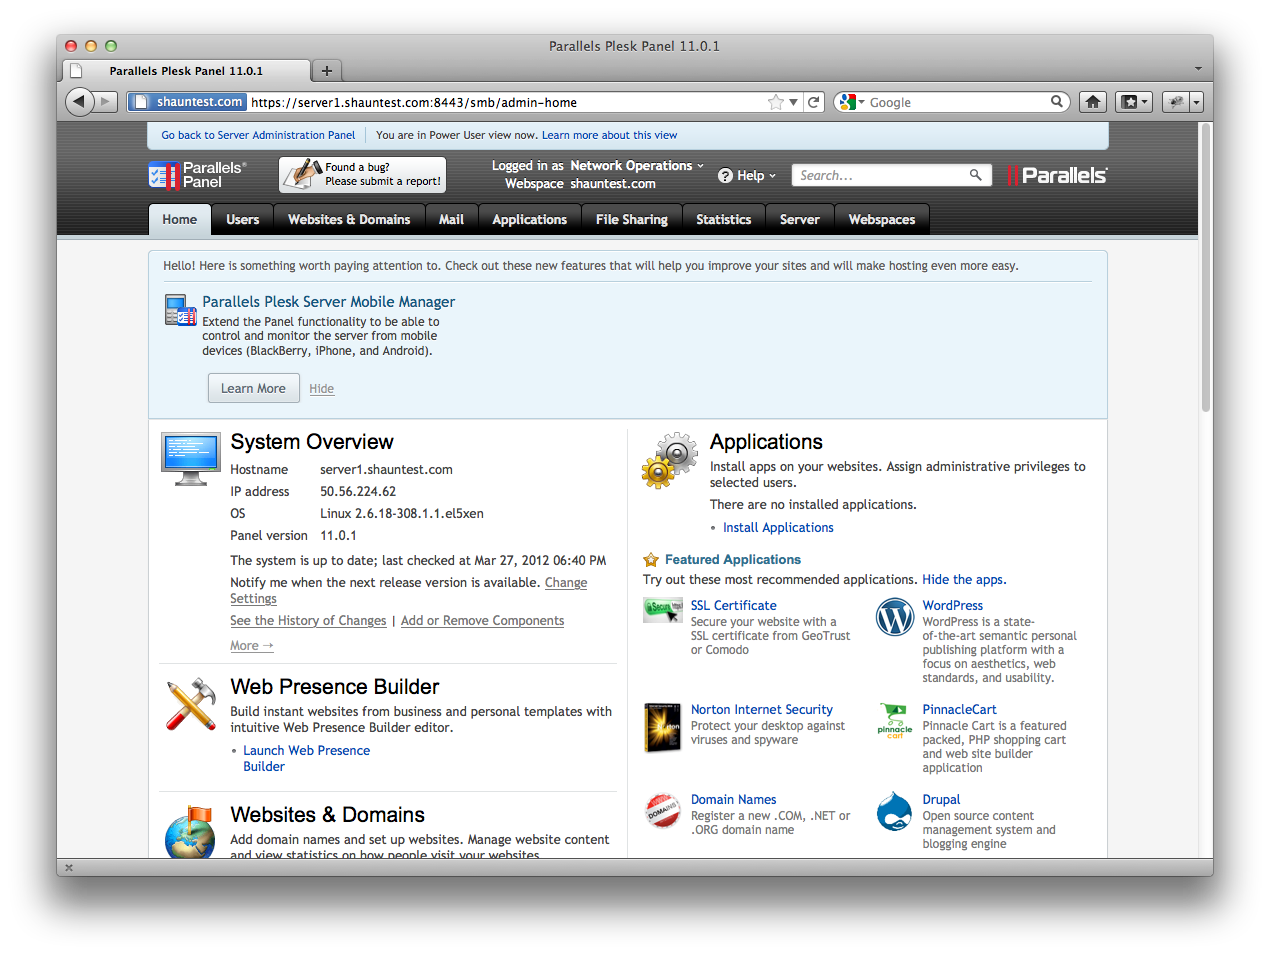
The end user subscription control panel has also been given a theme update in line with the new Plesk 11 scheme:
What’s new
Nginx
The most interesting new feature of Plesk 11 is the addition of Nginx as the default end-user facing web server.
This means that a server running Plesk will run two web servers:
- Nginx on ports 80 and 443.
- Apache on ports 7080 and 7081.
The purpose of Nginx is to handle all of the static content, and only use Apache to process the dynamic content by proxying the requests through.
By default this configuration would have Apache see the client IP address as ’127.0.0.1′, however Parallels have installed mod_rpaf – a module that changes the client IP address that’s visible to Apache when a request is coming from a known reverse proxy (in this case, Nginx).
Parallels states that this provides a number of performance benefits, including reducing the server’s CPU and memory consumption.
I ran a few tests to see how this would work and alas it seems that (at least by default), nginx passes all requests straight through to Apache for processing thus defeating the point. The Plesk generated nginx configuration that shows this is below:
server {
    listen 50.56.224.62:80;

    server_name shauntest.com;
    server_name www.shauntest.com;
    server_name ipv4.shauntest.com;


    location / {
        proxy_pass http://127.0.0.1:7080;
        proxy_set_header Host             $host;
        proxy_set_header X-Real-IP        $remote_addr;
        proxy_set_header X-Forwarded-For  $proxy_add_x_forwarded_for;
        proxy_set_header X-Accel-Internal /internal-nginx-static-location;
        access_log off;
    }

    location /internal-nginx-static-location/ {
        alias	   /var/www/vhosts/shauntest.com/httpdocs/;
        access_log /var/www/vhosts/shauntest.com/statistics/logs/proxy_access_log;
        add_header X-Powered-By PleskLin;
        internal;
    }
}
Personally I prefer to offload as many static requests as possible to a CDN. This feature could however be quite beneficial depending on the final implementation.
Smooth cloning
When Plesk is initially installed it binds itself to the IP addresses on the machine. When a server is cloned (eg: in VMware) it’s usually assigned new IP addresses.
Previous versions of Plesk did not handle this so well because services were tied to the original IP addresses.
The smooth cloning feature allows you to prepare a virtual machine running Plesk for cloning. When it’s cloned it’ll automatically discover the new IP addresses and adjust its configuration accordingly.
This has benefits for larger service providers running on non-Virtuozzo virtual infrastructure that need an easy way to create a customer image with Plesk pre-installed.
Other features
Besides the notable features already mentioned, a few other features have been added including the ability for APS applications to manage a domain’s DNS. This feature allows zones to be automatically modified upon the installation of an APS package rather than requiring the changes to be made manually.
For a full list of minor features, please refer to the release notes.
Want to give it a try?
If you want to give the preview of Parallels Plesk Panel 11 a try on your own server you certainly can. The software along with a license key is available for download at http://www.parallels.com/au/download/plesk/11/. If you do give it a try, let me know your thoughts!
Conclusion
Out of the changes in this release the feature that interests me the most is the nginx acceleration. From an operational perspective, the ability for DNS zones to be modified by APS applications can certainly reduce the load on a service desk, and the ability to prepare an installation for cloning can certainly make server provisioning quicker.
I look forward to seeing the final set of functionality in the release candidate!